
To post a job on Handshake:
1. Start by clicking Post a Job from your home dashboard:

You will now be asked to complete 4 steps: Job Basics, Job Details, Job Preferences, and Schools to post the job to. You don't have to fill out every field to create your job - required inputs will be identified with an asterisk (*). Note: the more fields you complete, the more well defined your job posting will be (and the more likely you’ll be to attract well-qualified candidates).
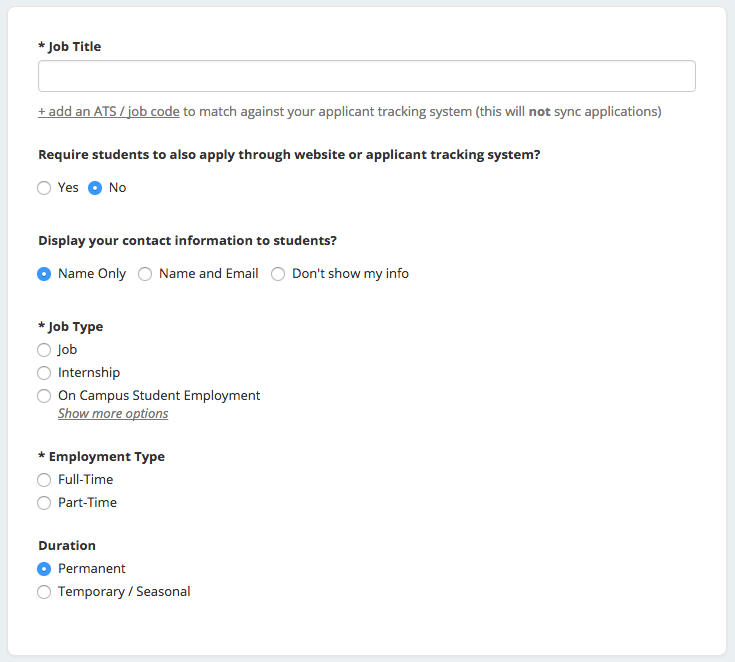
2. Let's start by going through Job Basics:
- Add a Job Title
- You'll see an option below to add an ATS / job code. If you select this option, you'll be able to add a tracking code to this job that matches the job on your own external site. It's useful as a reference number, but does not actually provide any additional functionality.
- If your company has Divisions set up, you'll see that option appear right below job title
- Require students to apply through an external website or applicant tracking system
- If you select "yes" for this option, you'll be able to input a url for them to apply through
- Note, they will still apply through Handshake first, but they will see your link to also apply through your own system as a required step.
- Display your contact information to students
- If you'd like students to see your name, or your name and email as a point of contact for this job, select either option. Otherwise you can always choose "Don't show my info"
- Add a Job Type
- Don't see the job type you're looking for? Choose "Show more options", and you'll see options for Cooperative Education, Experiential Learning, Fellowship, and Graduate School
- Add an Employment Type & Duration
- When selecting Temporary / Seasonal, you'll need to add both the start and end dates.
3. Once you're finished with Job Basics, choose Next along the bottom of your screen. Next we'll go through adding in your Job Details:
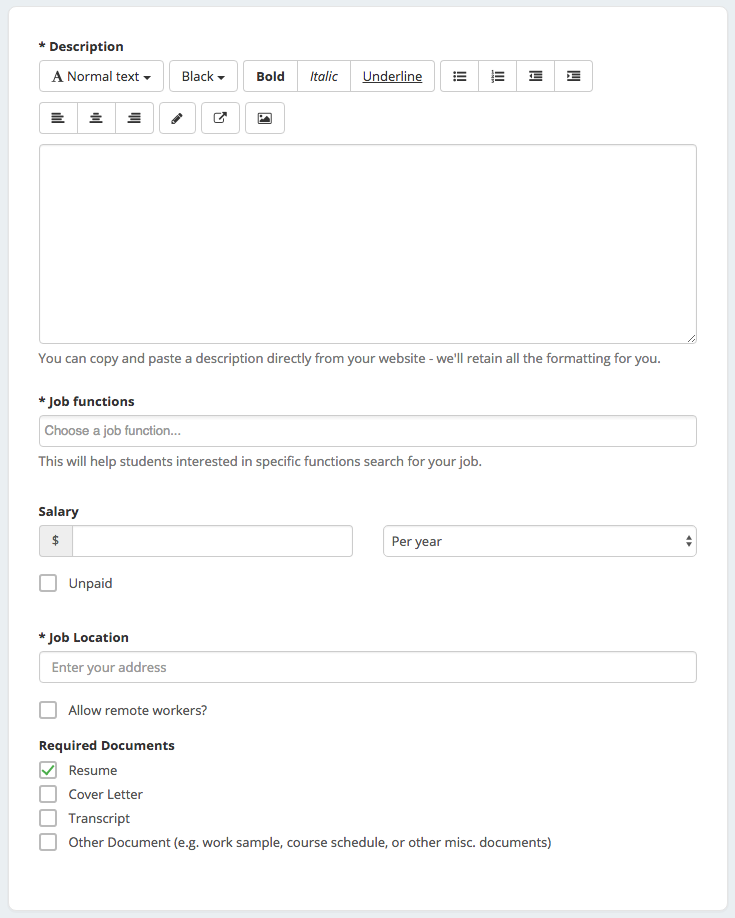
- Add a Description for your job
- If you copy and paste a description from your own website, we'll retain all of the formatting for you
- Choose Job Functions from the dropdown
- This helps students search for jobs by their functional area
- You can add a Job Salary if you'd like, however this is completely optional.
- You can also toggle the dropdown on the right between per year / per month / per hour, or mark the job as an unpaid position
- Enter a location for your job
- As you start typing the address, some suggestions will show up in the address field - you must select one rather than manually typing it in.
- This can be a specific office location, or a general city like "Chicago, USA"
- If this position is located in multiple locations you can select Add Another Location

- If your job is in the United States, you'll see an additional "Eligibility for international students" section appear. We'll talk about that below.
- Finally, choose which documents to require students to submit with their application
- As mentioned above, choosing a job location in the United States, will open up an "Eligibility for international students" section
- Select either of the options that appear, or read more about them with the additional links provided

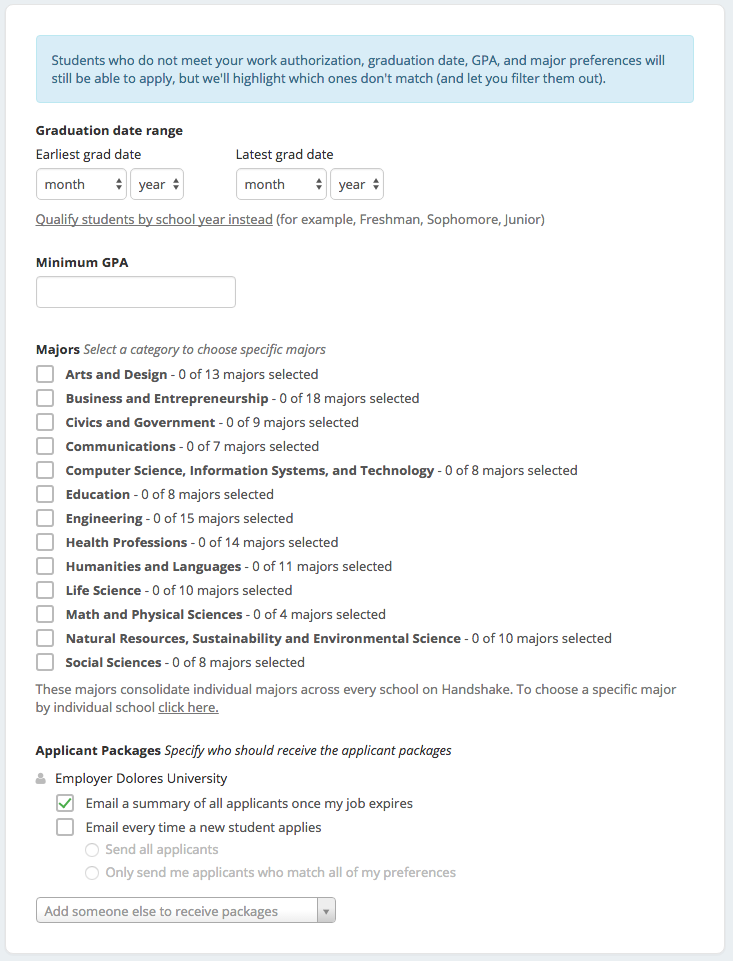
- Note: none of the preferences you add to this page will block students from applying for your job. But we will show you candidates that meet all of your preferences, and those who don't. You can learn more in our article on Job Preferences.
- Also note: all of these preferences are completely optional.
- Add a Graduation date range for your job by specifying the earliest and latest graduation date for qualified applicants
- Prefer to qualify students by School Year - like Freshman, Sophomore, Junior? You can select the link below to toggle to that option instead.
- Add a Minimum GPA value
- Choose which Majors would make a student qualified for your job. This step is discussed in more detail below.
- Finally, configure who should receive Applicant Packages, and with what frequency. We've also added additional details on this below.
- Setting up your Major Preferences
- So by choosing "Computer Science", I am mapping my major preference to each schools' individual term for "Computer Science"
- Even if it's name "Software Engineering" at a different school, it will still get bucketed into this major correctly
- Note: these majors are consolidated across every school on Handshake.
- Once you select a category (by clicking on the checkbox next to it), that category will expand to show the majors within it.
- All majors within a category will be selected by default. But I can remove them by simply clicking on the major I'd like to remove.
- In the image below, I've chosen to remove Library Sciences, User Experience, and Information System Management from the Computer Science category. I see that I've selected 5 of 8 majors.

-
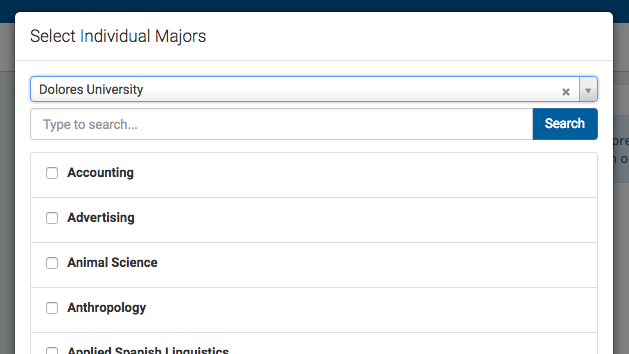
- If you know of a very specific major at a school that you'd like to choose instead of our mappings, choose the link at the bottom:

-
- This will open up a modal to pick your school and major manually:
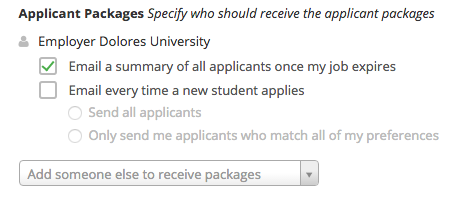
- Setting up who should receive Applicant Packages
- Email a summary - you'll receive one email once your job expires
- Email every time - you'll get emails each time a new student applies. If you choose this option, you can then specify whether you want every student who applies, or only students who match all of your preferences (Eligibility for international students, grad date / year, GPA, and Major).
- You'll see your name listed first. You can select (or remove) the following options:
- You can also add other teammates to receive packages by choosing from the dropdown. If you haven't added them as a contact yet, there will be + add new contact at the bottom of the dropdown.
5. Once you're finished with Job Preferences, choose Next along the bottom of your screen. Next we'll go through School selection:
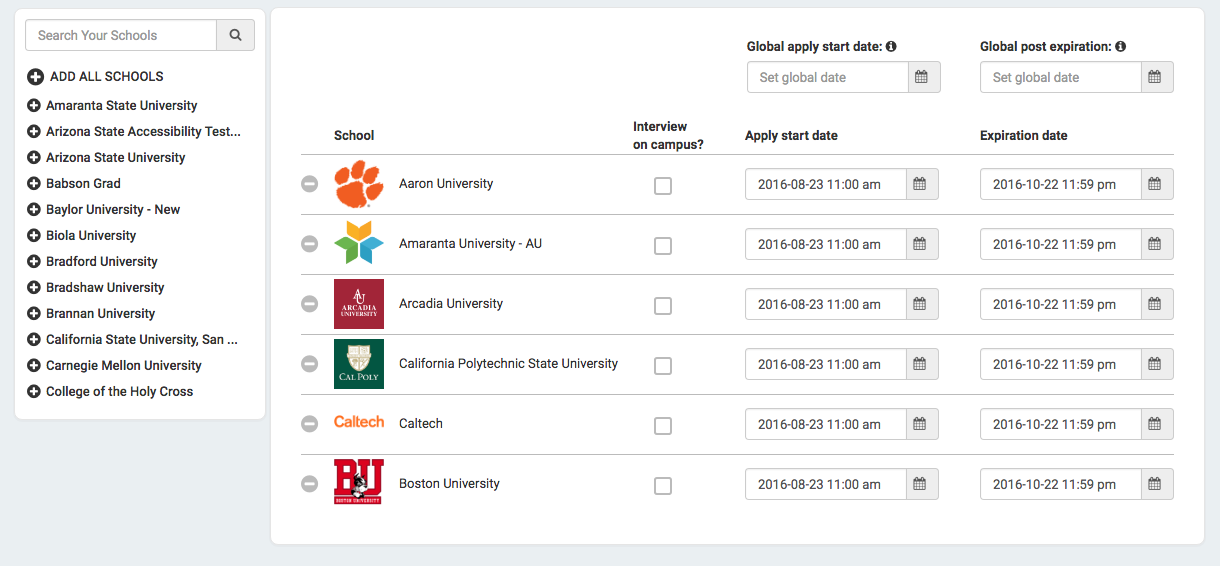
- Add schools on the left, and you'll see them appear on the right in a table
- Note: if your company has not been approved to post jobs at a school, you will not see that school as an option. If you have not been approved at any schools, you can still create this job and come back later to add schools.
- If you'd like to post this job to all schools you've been approved at, select "Add All Schools" at the top
- Once you've added schools, you'll see a few options to manage them
- Remove a school - The (-) to the left of each schools allows you to remove it from the list
- Interview on campus? - selecting this will simply flag this job on the school side, as an employer potentially interested in interviewing. To actually request an on campus interview, please see the relevant help article.
- Apply start date - you can choose if you'd like to block students from applying to your job until a specific date.
- Expiration date - you can update the date that the job will expire at that school (and students will no longer be able to apply).
- Adding a Global apply start date allows you to update the job start date for every school on your list (it will overwrite previously set start dates).
- Adding a Global post expiration allows you to update the post expiration for every school on your list (it will overwrite previously set expiration dates).
6. You're all set! Choose Create on the bottom navigation to create and review your job